Things are beginning to get a little creepy around here…


We’re nearly ready for our visitors tonight… Are you?
Have a safe and Happy Halloween!

Things are beginning to get a little creepy around here…
We’re nearly ready for our visitors tonight… Are you?
Have a safe and Happy Halloween!
I am a self-professed plant killer. It’s sad, but true. I can kill ANYTHING. Ficus, ivy, peace plants… you name it, I’ve killed it. Unfortunately that also includes my herbs. I’ve tried herbs at least a dozen times now… and every time I’ve killed them. We had lofty ideas of making our own salsa with fresh cilantro straight from our garden… Yeah… Hope Pace is good enough for everybody, because there’s not a crispier plant in my yard. Except maybe the mint. Who on EARTH kills mint?

While on my plant expedition to Lowes I picked up my favorite plants. Succulents. Somehow, I haven’t killed succulents… Maybe because I can forget them for 3 weeks and they still look good. I went on a succulent kick. It’s only going to get hotter on the deck, so I figured I’d work with what I know.

MUCH better, No?
This container I put on the back side of the hot tub with our lantern and OFF! bug lantern…

I LOVE a backyard filled with pots of plants… but I think I’m at my limit. Any more than this, and I’m sure someone will be knocked off quickly.

And I finally found a spot for my hammock…. I will spend HOURS out there reading this summer. It’s in my shade garden. Now there’s a table next to it to hold an OFF! candle and a cocktail. Perfect.

Do you ever have something that you just don’t know what to do with it? Trash that is… Do you recycle it? Do you cut it up and bag it? Do you give it to your parents who live out in the country with less stringent waste management programs?
We’ve been kicking around these metal planters since our move to Texas… almost 2 years now. They were a pretty coppery modern pair that turned into a rusted up mess in one, and the other just looked terrible.
While looking at putting more plants out onto the deck, I remembered I had these planters out behind the garage. One was still trash, no matter how hard I tried to work with it… but the other?
It got cleaned up with some soapy water and a wire brush. Then I used an outdoor metal primer, and a bit of aged copper spray paint made for outdoor use. Check out those sparkles!
After patiently waiting for the paint to dry, I filled it with some of the Miracle Gro Moisture Control potting mix, a Queen palm, and some Creeping Jenny.
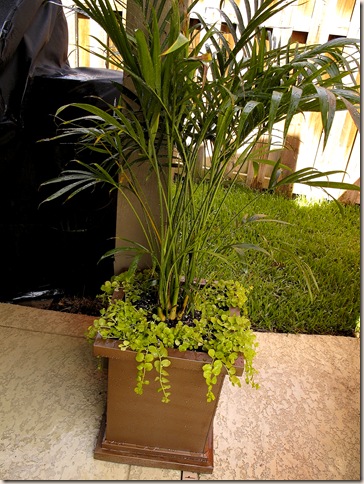
It helps to add more of an outdoor room feel to the patio and connects our lounging area to the rest of the seating group. I also put one of those beach sand umbrella holders behind our chairs. It screws straight into the ground and holds an umbrella where ever you need one. The afternoon sun in this spot gets SO hot. I still need to locate some cute pillows, but this space is coming along nicely. I love reading out here!
Seriously, this creature makes me question the existence of aliens.

Last year, my friend and I freaked out over these nasty little guys… They looked like bird poop on my lemon trees. Then as we were bending down over the tree, it MOVED. AND it had a scary face with horns (which apparently gives them super scary powers against their predators). Cue the screaming & skeeved-out shivers. They had eaten their way through most of the leaves on these trees that I had babied for a couple of years… and I’m DETERMINED to have some lemonade one day. Obsessively determined.
While watering the lemon trees this morning, I saw that the nasty little creatures had returned. Today, unlike last year, I was prepared. I broke out my handy dandy organic pest spray and hosed the suckers. Then, because I was skeeved out, I picked them off my precious leaves and stomped on them for extra satisfaction.
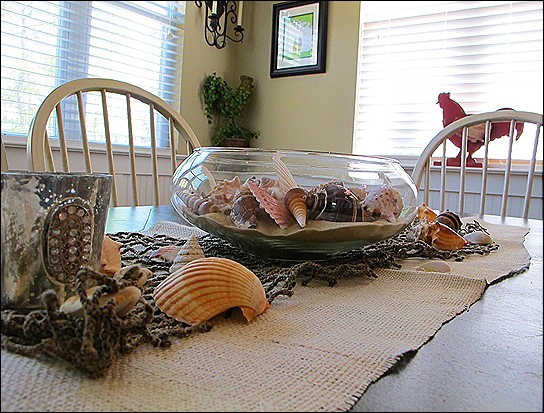
I thought I’d share a warm weather centerpiece that I recycled from Baby’s birthday party decorations… Super easy burlap with a net and a glass bowl filled with sparkly decor sand from Michaels… Sea shells scattered all around and some mercury glass votives placed randomly amongst the shells. My girls will be so excited!!! They love fancy things like centerpieces and napkins ;-)
Boy! Long time no blog, right? Sorry guys… apparently I have to be “in the mood” to blog as well. :-/
I do have some pretty fun pics to share though. But I’m a construction geek and love this kind of stuff, so fun may be a relative term…
We finally had a break in the rain and our pool construction has started! I swear, as soon as we said “Build it” we guaranteed ourselves a good couple of weeks of rain. I’ve got to give a shout out to Rocky Kirk with Lonestar Pools. We met with 5 different contractors… and of the 5, he was the only one we felt completely comfortable with. For some reason, a good pool builder is hard to come by in Houston, because the nightmare stories some of our friends told us really had us shakin in our boots… Not that I wear boots. Ever.
Here’s a before shot of the backyard with the trees tagged for removal…

After the trees were removed (but before the stumps were ground) The girls had a great time hula-hoop ring tossing with the one stump that was left.

Here’s a hazy shot from my bedroom window of the dig starting this past Friday morning… This was at 7:30 am…

And this shot is from 4pm on that same day… These guys didn’t waste any time… We went from paint lines to finished rebar in one day… Wanna come sit in my hot tub? :-)

Beginning of Day 2… another glare filled shot from my bedroom window… Sorry…

And by the end of the 2nd day, you could see the general pool idea…


They didn’t work on Sunday… obviously, but on Monday they arrived bright and early… EARLY

and made a big HUGE mess of my entire back yard… That monster tool in the background dug a trench around the whole thing for the plumbing that finished up on Day 3, then the electrician did his work on Day 4. At the end of yesterday, we had our second inspection for the trench.
Wanna know what happens when you are at this phase of pool building? When your entire yard is ripped apart and a HUGE dirty mess? Yep, RAIN COMES!!! AHHHHH….. That’s where we are this morning… waiting on rain, crossing my fingers that is doesn’t stop them from coming out and filling in the previously mentioned huge dirty mess of a trench… because the only way this mess could get worse is if it turns into a HUGE DIRTY MUDDY mess.
So for a recap of all those pics, here’s what the yard looked like a week ago…
and here’s where we are now…
I keep telling myself that it will be totally worth the expense and mess when I can have a glass of wine in the hot tub and relax myself into oblivion…
Yeah, totally worth it.
How do you organize your home projects?
I’ve seen several blog postings recently on how to keep all of your home project info organized.
This is not that kind of post.
I don’t organize my home projects. Maybe I should, but that would require too much effort for me.
I DO however keep this super cute pink photo album with me at all times. It has basic room info (window measurements, paint chips, fabric swatches, and bits of trim) that I can use when I’m out and about. I can’t tell you how many throw pillows I’ve returned because I picked the “wrong shade of green”. Really, it’s embarrassing.
And here’s a handy tip… Keep a tape measure with you at all times!!! I’ve measured dozens of media stands looking for one that hit 49” wide…. and having this clip on tape measure with me has been a huge time saver (for me and any salesperson who’s SURE whatever they are selling would work for me)

View of the inside… just staple what you have to a 4X6 card and it can easily slide in and stay put!
:-) That saying still makes me giggle. One day, I’m going to pretend I am ferociously brave and get that vinyl wall piece that says that…
Previously at the Neal house…
The view from my kitchen… OBVIOUSLY not a pretty sight…
Ugh… I can’t even believe I took this picture, much less that I’m putting it out there for all the world to see. But there it is… in all it’s tutu’d glory.
Clearly, this is the “after” shot…
as viewed from the kitchen
Hooks for my purse and keys…
the laundry room connects our kitchen to our garage
Ahhhh… No more tutus.
I replaced them with a drying rack from Ballard Designs, a bin to catch mail, and lots of extra cabinet space and drawers . This remodel nearly doubled my kitchen cabinet space. (which just goes to show you how small my kitchen is…)
And yes… I actually use it… See those towels? They are hiding my Hubby’s tighty-whitey underpants. Aren’t you glad I don’t love you enough to show you THAT? ;-)
I cannot TELL you how much better this room makes our house function… which helps with my “loving the one you’re with” philosophy regarding staying in this house. And really, it makes laundry much easier to do… no a JOY to do, but EASIER. The new Samsung washer and dryer set helps as well… We went from nearly 10-12 loads of clothes a week, to 4-5 loads. Which is SHOCKING for me, because we had very large capacity machines before… I still am amazed by how these guys save me so much time (and water & $$$).
The cabinets were the closest match that Lowe’s had to our kitchen cabinets. The view from the kitchen really is great to see, which makes me so happy that we didn’t go with white laundry room cabinets. The granite also matches the countertops already in our kitchen. I took the door between the two rooms down, so it’s become more of a pass-through from the garage (not that we can park in there yet…)
We also improved the lighting greatly by taking down a single light bulb, ceiling hugging fixture and installed a craftsman style track system (also from Lowe’s.) I really used to hate these style of light fixtures, but now that they are easily available in a variety of styles, I LOVE them. We chose a 4 bulb style that allows us to aim the light in the direction that it’s most needed. And in a room like this with no windows, it has made a wonderful difference in this room.
Not including the washer/dryer set, this remodel took around a month and a half & came in around $5,000. And was well worth every single penny and the time it took to get it done.
So that’s been my project of the summer. Along with driving the girls to and from camps, ballet classes, and play dates. I can’t believe that we’re already into August!
Next project: The girls’ bathroom… of which I’ve sledge hammered up most of the ugly beige ceramic tile already :-) My husband loves me… He really really loves me. Either that, or he’s very very scared of me ;-)
eh, I’m going to let the following picture speak for itself…

When we moved in this past September, I must have been on crack to think that this dresser in Abby’s closet was going to actually work.
So, after a few measurements and a trip to Lowes, this is what we’ve got…


It was easy to install, and gave us the “place” part of Everything in it’s Place… And guess what… it STILL looks like this… And once she gets taller, one side of the lower rods can snap out to allow for longer dresses.
Several weeks ago I got an itch… NO, not THAT kind of itch… The project itch… It started out as a pool itch… until we got the quote… The kind of itch that lead me to agree to show my home (which isn’t for sale) to a couple (who LOOOVED my house) and then drag a realtor around in a mad dash to find “The” house for us… so we wouldn’t have to deal with putting our own pool in… because apparently, in MY world, moving isn’t as much of a pain in the ass as putting in a pool would be. Are you following what I’m saying?
You should know… I AM medicated. OBVIOUSLY it wasn’t working!
Well, long story short, they bought a house with my floor plan but one extra garage bay. :-/ I wont even BEGIN to publicly announce the sorts of names I called these people. Let’s just say we learned an valuable lesson.
Love the one you’re with!
Because we weren’t willing to list our house (because that takes effort) or to drop 1/2 a million dollars on a new place, we decided to work on the efficiency of this house. You know… the one we moved into 9 months ago? The one we purposefully chose because it was cute, and had charm, and was well below our budget. Yeah… cute and charming only got me so far. What it didn’t get me was STORAGE!
So in the name of efficiency, I’ll be working on a series of posts dedicated to making what you have work for YOU! There are so many ways to take your space and Kick it up a notch. There is no ONE way to do it… just look at what you need your house to do, and then help it along it’s way.
First up… The KITCHEN
More specifically, the cabinet under my range and a few of my utensil drawers. We initially had to buy new silverware holders because the drawers in the new kitchen were more narrow than the old house… but every time you closed the drawer it would slide all over the place. So I had “Honey” put in these…


Muuuuch better…
Then we tackled the pots in the cabinet. Has anyone ever weighed their Le Creuset pot? Those things are darn heavy!

See Honey?
You too can be handy!
Look what Honey did! Can we have a collective round of applause for Honey? Yeah!

These are full extension stainless steel drawer systems that we picked up from Lowes. I LOVE that I can put my heavy cast iron in the back and still be able to get to it when I need it. FYI… the reason we didn’t do the wooden drawers… The metal ones let you put your lids in vertically so that you can save space! The drawer organizers are a bamboo system that you can mix and match to your needs… also from Lowes.
I’m sure by now you are wondering how many posts in one day I’m going to do… I will apologize to my lovely followers in advance. Once I catch up on the posts, I’ll get back to a regular schedule!
You know that “snowball effect” that can happen once you start doing something around your home? eh, Yeah… so here’s the OTHER kitchen lights I changed out…

See how we have this tray ceiling above my island? It did have two of those can lights in it… But not anymore! Ballard Designs has a great kit to change them out into pendant lights… If you can screw in a light bulb, you can do this! Look really close, you can see the light on the pendant being reflected above. BOY do they make a HUGE difference in the amount of light being cast about.

You can tell they are the aged bronze ones, but with the lights on… well, I promise they are a really cool burlap fabric drum shade. Easy Peasy

*hugs!*
Holly
Yeah, you just thought we’d seen the last of the kitchen light posts… However, my super cute drum shade taught me something… That whole “lipstick on a pig” saying… well, it’s true. No matter how cute it was, it just didn’t change the fact that we still couldn’t see what we were eating at night. So I convinced my dear, lovely, not-so-handy husband that he too could change a light fixture.
So we went from this…

To this…

To this…

Yep, NOW we can see. Unfortunately it doesn’t make my food TASTE any better…
Oh, and this Live Writer thing is Da Bomb!

*hugs*
Holly